Create a new file in your project’s root netlify.toml. If you’re using out Startup Hugo theme, the file is already there, so you can skip this step.
Paste the following code in the netlify.toml file and save:`
[build]
publish = "public"
command = "hugo --gc --minify"

[context.production.environment]
HUGO_VERSION = "0.111.3"
HUGO_ENV = "production"
HUGO_ENABLEGITINFO = "true"

[context.split1]
command = "hugo --gc --minify --enableGitInfo"

[context.split1.environment]
HUGO_VERSION = "0.111.3"
HUGO_ENV = "production"

[context.deploy-preview]
command = "hugo --gc --minify --buildFuture -b $DEPLOY_PRIME_URL"

[context.deploy-preview.environment]
HUGO_VERSION = "0.111.3"

[context.branch-deploy]
command = "hugo --gc --minify -b $DEPLOY_PRIME_URL"

[context.branch-deploy.environment]
HUGO_VERSION = "0.111.3"

[context.next.environment]
HUGO_ENABLEGITINFO = "true"

[[redirects]]
from = "/en/*"
to = "/en/404.html"
status = 404

[[redirects]]
from = "/de/*"
to = "/de/404.html"
status = 404
The next thing you need to do is create a Netlify account if you do not have one already go to Netlify and sign up.
Now that our Netlify account is created, we are ready to add our site to Netlify. Login into your Netlify account.
Click on the “Add New Site” button and select “Import an existing project”
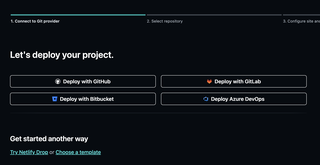
Next click on your Git provider e.g. “Deploy with Github”.
Pick your website’s repository from the list and click “Deploy” Button.
Netlify will automatically assign a URL to our site. We have the option to change this URL to something more memorable or connect our own domain to the site. Let’s start by looking at how to rename the Netlify domain.
After you finish importing the repository, Netlify will direct you to the site details, where you can find the URL that Netlify has assigned (usually the netlify.app domain) to the site. Additionally, you can view the Production deploys that have been done for the site, which, at this point, will only include the initial deployment.
If you want to modify the URL that Netlify has assigned, follow these steps:
The last task is to fix the asset references on our site. Currently, our config.toml file specifies that the baseurl is example.org. We need to update this to match our Netlify URL.
Follow these steps to make the change:
config.toml file located in the root of our theme.Once you’ve pushed the changes to your repository, Netlify will automatically build and deploy your site.

